
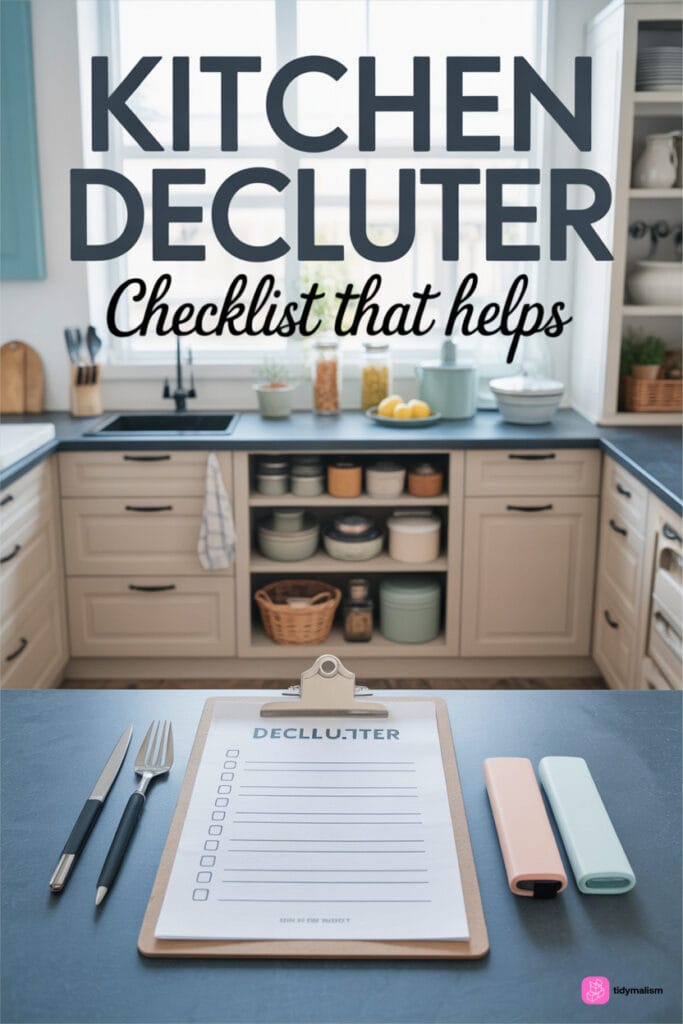
This guide gives you a working checklist for cabinets, drawers, and counters. We’ll sort by zone, make faster keep-or-remove decisions, and set up simple habits that keep the space usable after the cleanout. The focus stays on real kitchens and real routines, because a tidy kitchen only helps if it makes cooking and cleanup easier!
Set Some Goals Before You Start
Begin with a simple question: what does a useful kitchen look like in your home?
For one household, it might mean clear counters and fast breakfast access. For another, it could be making room for lunch prep, baking tools, or school snacks. Write down three goals on paper or in your notes app before you touch a cabinet, or a least make a mental note of them. That baseline keeps you from saving things out of habit.
Next, set a limit on time and scope. A small kitchen usually needs two to three focused sessions of 45 minutes. A larger kitchen may need four or five. I wouldn’t empty out every cabinet at once unless you’re sure you can finish it all on the same day. Pick a realistic order, such as upper cabinets first, then pantry food, then drawers, counters, and so on.
It also helps to set your decluttering rules now, not in the middle of the mess. A common starting rule is this: if you haven’t used something in a year, and it doesn’t serve a holiday or clear backup purpose, remove it.
Add one more rule for duplicates. Keep one everyday version, one backup only if you really use it, and give away or dispose of the rest.
Gather Supplies for Sorting
Good prep saves time and stops the common mistake of making a bigger mess than the one you started with. Put your tools on the table before you begin so every item has a place to go right away.
Set up your sorting station
- Bins: Use 4 laundry baskets, boxes, or reusable grocery bins labeled Keep, Move, Donate, and Trash.
- Cleaning cloths: Microfiber cloths, a dish soap spray, and a dry towel should do the trick for shelves and drawers. If you have a handheld vacuum, that can be handy, too.
- Labels: Masking tape and a marker work fine for temporary labels on bins or in new zones.
- Donation bags: Keep one bag open the whole time so you don’t create a huge “I’ll deal with this later” pile.
If I’m doing a major kitchen declutter, I like to keep a small notebook or my phone within reach for taking down any random measurements or notes. If a shelf is wasting space, measure its width and depth before ordering any new organisers. You’ll do better with one $12 shelf riser or a $15 lid rack than with storage containers that don’t fit!
Start Your Kitchen Declutter by Emptying Cabinets by Zones
Work through one cabinet at a time. That sounds slow, but it’s faster than sorting a mountain of mixed items across the floor.
Finish a single zone fully before moving on. Remove items, wipe down the shelf, sort, and put back only what belongs there. Then move on to the next cabinet.
Use a short test for each item: Did you use it in the last month? Does it fit the meals you cook nowadays? Is it easy to store?
If the answer is no across the board, it should likely go. Be honest with specialty pieces that looked useful in the store but now block access to everyday items.
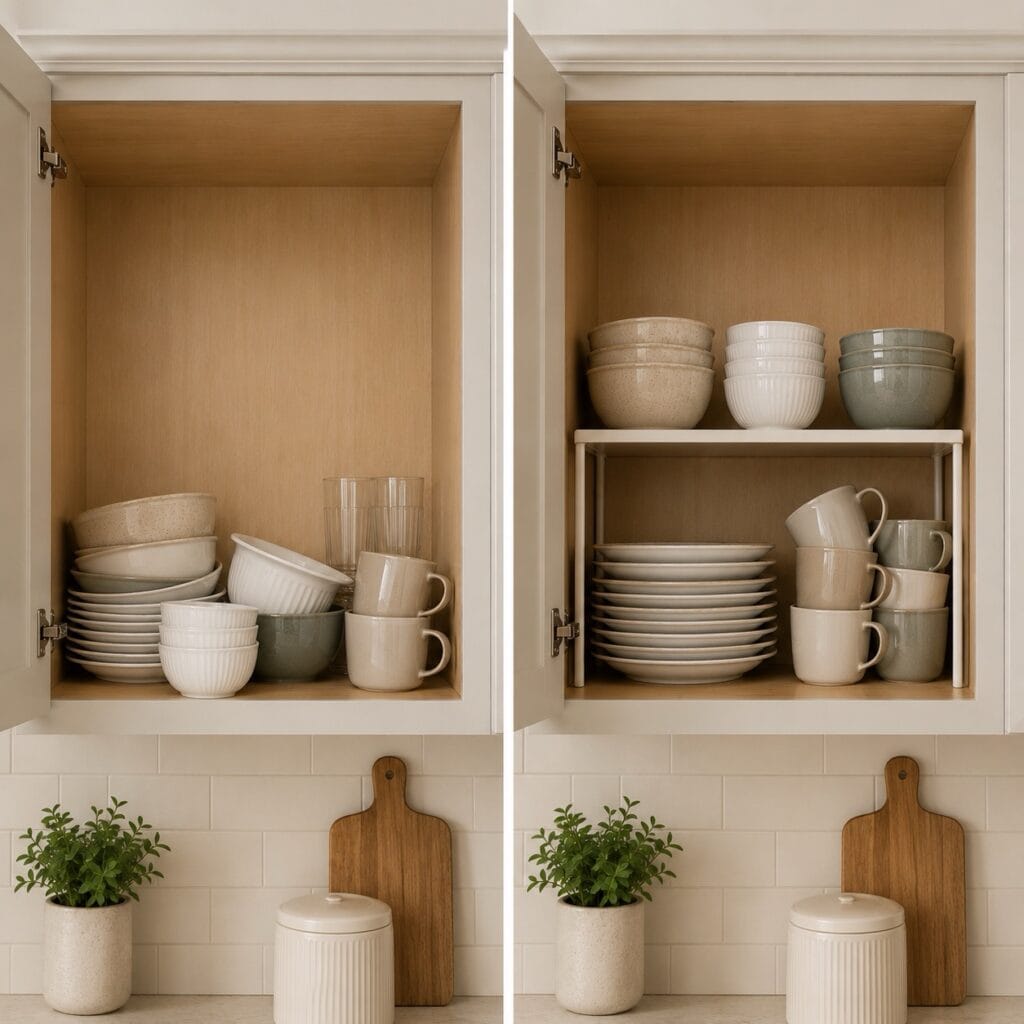
Now’s also a good time to reassess cabinet height and reach. I like to store everyday dishes and glasses between shoulder and waist level. You could put rarely used serving pieces up high. Lower cabinets are good for holding heavier items like all your pots, mixing bowls, and small appliances. This zone method keeps your kitchen easier to use and easier to maintain.
Check Pantry and Food Storage
Food can also be clutter! A pantry may look full, but half the space could be taken up by stale crackers, duplicate pasta boxes, and spices that lost their smell years ago. Pull everything out shelf-by-shelf, then sort fast and without debate.
- Check dates: Toss expired baking powder, old oils, any mysterious old open grains, and mystery containers without labels.
- Combine duplicates: Pour half-empty bags of the same rice or pasta into one clearly labeled container.
- Group by use: Put breakfast items together, baking supplies together, lunch fixings together, and weeknight dinner staples together.
- Face labels forward: This small step helps you see what you have before you shop again.
If you decant dry goods like I do, label them and add an expiration date. A Sharpie and painter’s tape along the bottom or side works great if you want a low-cost option. Or you can opt for a handheld label maker (I love my Dymo!).
Keep your most-used staples in the easiest-to-reach spot, not the prettiest one. The best pantry setup supports how you cook on a regular Tuesday night, not how a styled shelf looks on Instagram. Keep it real!

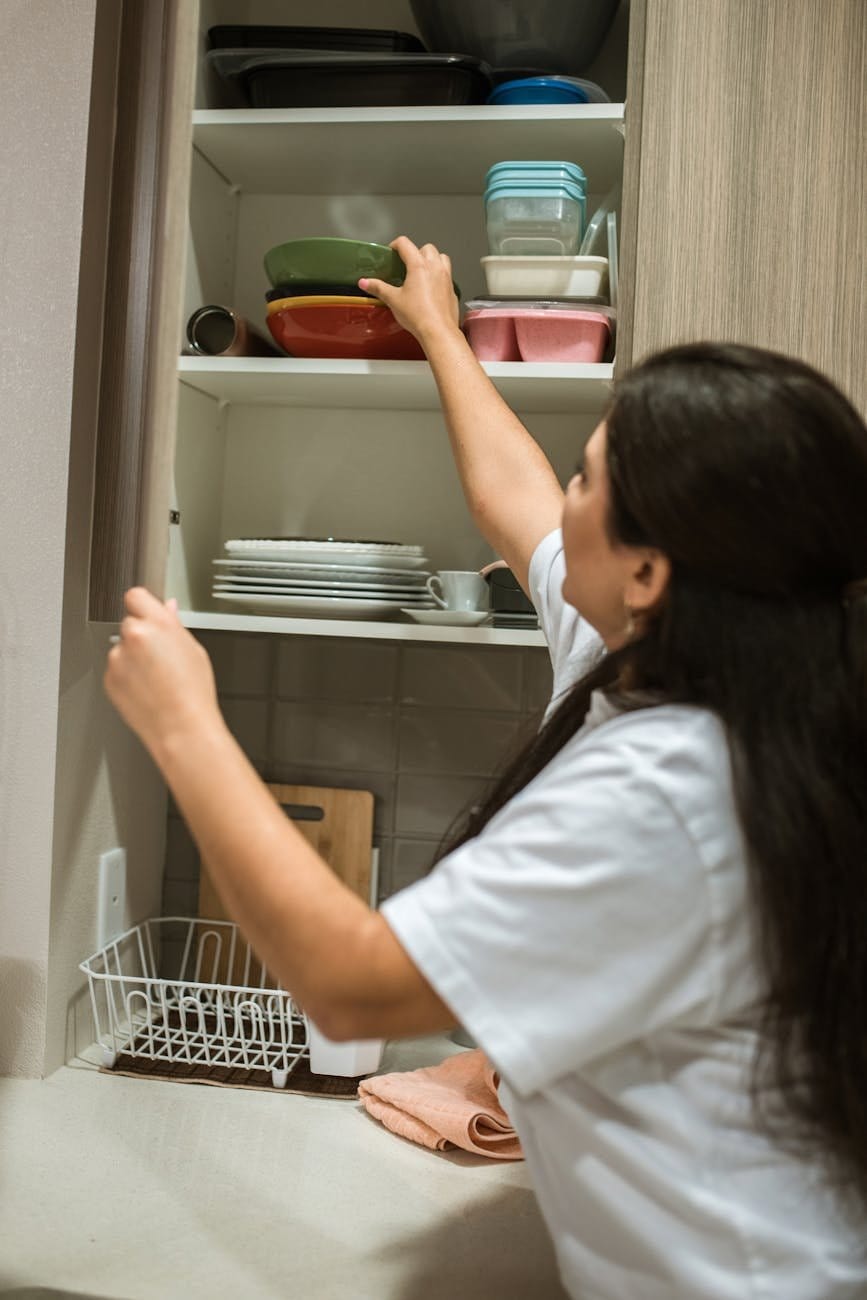
Sort Dishes and Glassware
Cabinets packed with plates and mugs create daily friction. You stack things too high, hear clinking every time you unload the dishwasher, maybe even avoid putting items away in the first place because the shelf is so full.
Give your dishes a hard review based on use, not on what came in the set!
Count what your household genuinely needs. A four-person home often does well with 8 dinner plates, 8 small plates, 8 bowls, and 8 to 12 everyday glasses. That covers daily use plus random guests without turning cabinets into storage lockers.
If you own 24 mugs but use the same 5, keep your favourites and let the rest go.
Watch out for chips, cloudy glassware, and awkward oversized pieces that don’t fit your dishwasher or shelves. Those items take up prime space and rarely improve daily life. Reserve one separate spot for holiday or guest-only pieces if you use them every year. Your target is working inventory, not maximum inventory.
Edit Pots, Pans, and Lids
Cookware commonly collects duplicates because people tend to buy in sets or by sale, not necessarily by need. A crowded lower cabinet makes every meal feel harder, especially when lids slide everywhere and heavy pans jam the door.
Match the cookware to your menu
What are the five meals you make on a regular basis? Check which pans those meals actually use. A lot of kitchens really need only a 10- or 12-inch skillet, a saucepan, a stockpot, a sheet pan, and one casserole dish. If you never use the wok, slowcooker, giant stockpot, or second roasting pan, it may be high time to move it out.
Assess for damage and tackle storage problems
Discard nonstick pans with deep scratches, warped baking sheets, and any pots with broken handles. (Recycle metal pieces if your local recycling centre accepts them!) Store lids vertically in a wire rack or tension-file sorter so you can pull one out without lifting a pile.
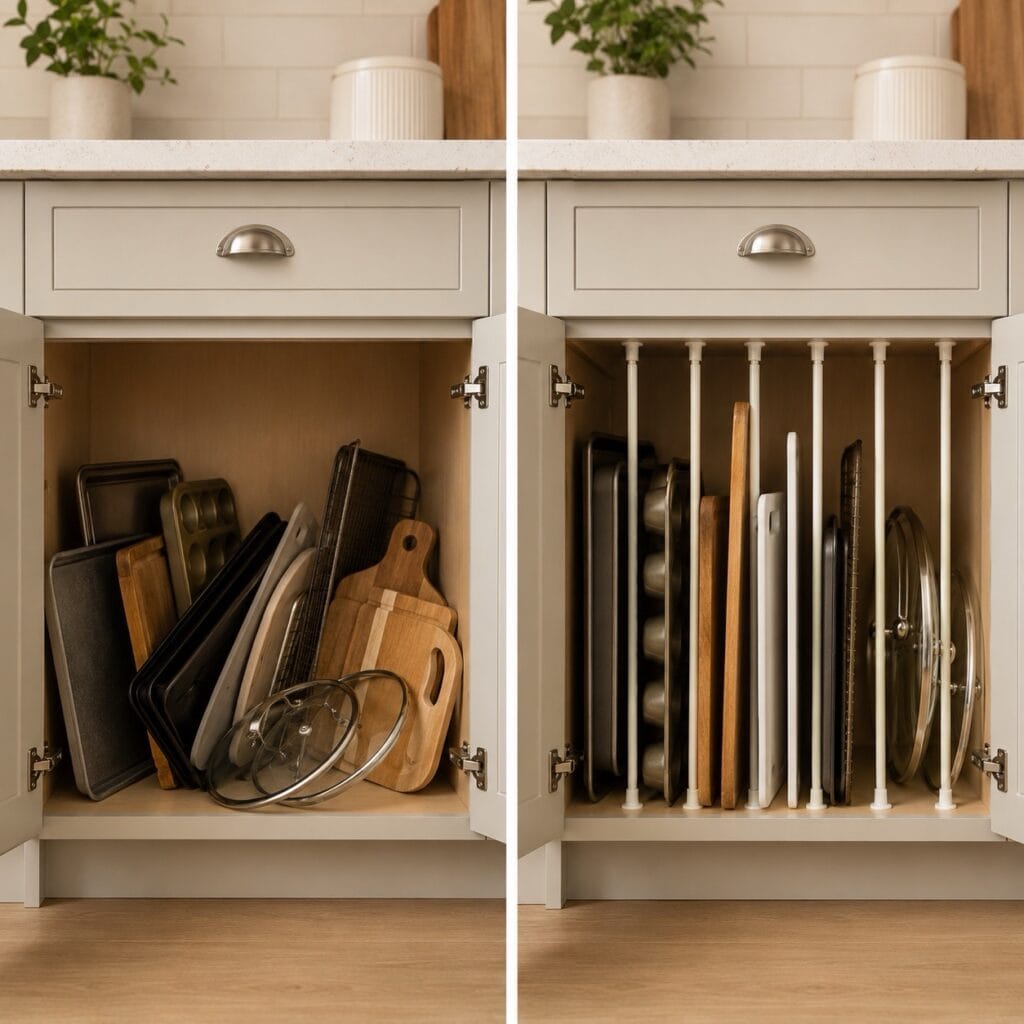
The goal here is fit: each piece should earn its cabinet space and store without a struggle.
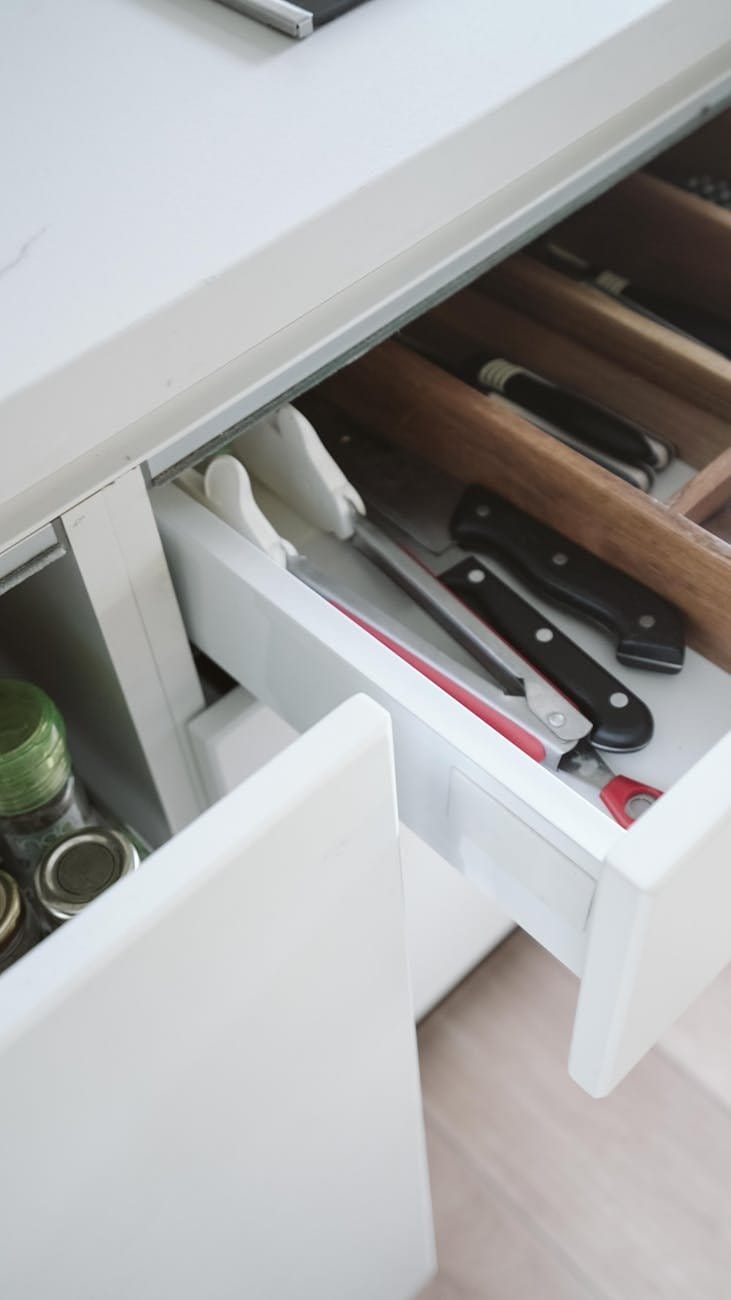
Streamline Utensil and Tool Drawers
Drawer clutter builds quietly. You buy a second peeler because the first one vanished, then find both under a garlic press you never liked. Yeah, I’ve been there!
Keep only what works
- Test tools: If the can opener slips, the tongs don’t lock, or the whisk is bent, let ’em go.
- Cut duplicates: Two spatulas may help. Six probably do not, unless you bake in bulk every week.
- Be critical about single-use gadgets: Egg slicers, avocado tools, and novelty choppers are really only keepers if you use them.
Use drawer dividers with fixed sections, or even small food-storage boxes, to separate cooking utensils from measuring tools and bag clips. Put the things you reach for daily in the front half of the top drawer. This one change reduces rummaging more than most people expect.
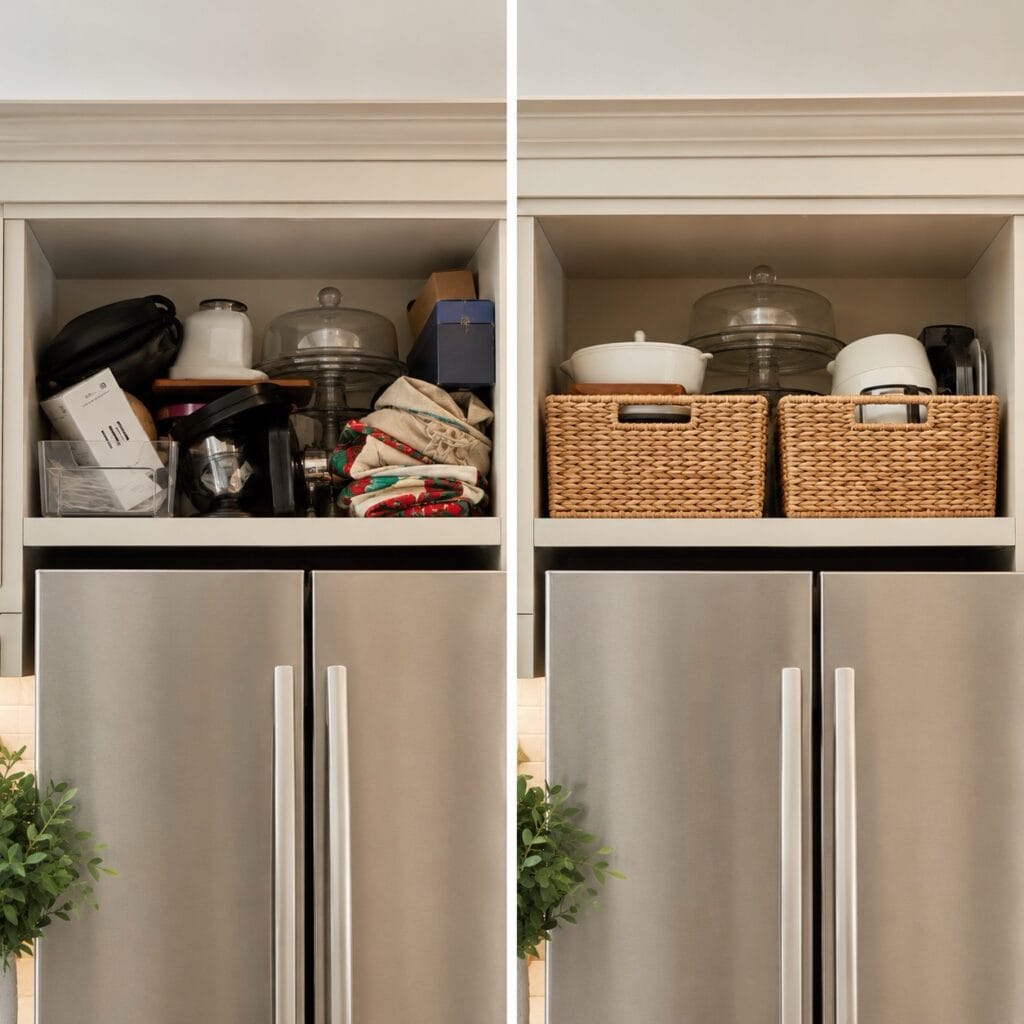
Reset Junk and Catchall Spaces
Every kitchen has a drawer or corner that catches batteries, takeout menus, pens, loose change, and hardware that belongs somewhere else. Clean up this zone with a stricter standard than the rest of the kitchen. If an item is not used for cooking, eating, cleaning, or household paperwork that truly belongs nearby, it’s probably time to move it out.
Then give the remaining items simple homes. Use one small tray for pens and scissors, one cup or bin for batteries, and an envelope or folder for coupons and gift cards. Limit this space on purpose. A catchall or junk drawer should hold a few useful categories, not become a hidden storage unit.
Countertop drop zones need the same rule. One popular fix is to have a solitary bowl or tray as an entry point for keys, menus, and mail, then stop there. This container limit keeps random clutter from spreading across your food-prep space.
Clear the Counters
Counters should support your meal prep and cooking experiments, not serve as long-term storage. If you have to move three appliances just to make a sandwich, the setup is working against you!
I removed everything from my countertops and basically rebuilt the space by religiously keeping only the items I use at least three times a week on the counter. The result is wonderful! Because the counters are mostly empty now, my small kitchen looks a lot airier.
| Item | Keep on counter | Store in cabinet or pantry |
|---|---|---|
| Coffee maker | If used daily | If used only on weekends |
| Toaster | If used most mornings | If used a few times a month |
| Stand mixer | If baking weekly and lifting is hard | If used only for holidays |
| Knife block | If drawer space is limited | Use a drawer insert if you want more open space |
Leave at least one clear prep zone about 18 to 24 inches wide near the sink or stove.
A good habit to get into at the end of each night is to wipe down the counters with dish soap spray or an all-purpose cleaner and put away anything left out. That open space is rewarding, and the whole kitchen feels clean when you start your next day.
Maintain Order With Simple Habits
A decluttered kitchen stays that way through small daily resets, not rare marathon cleanups. Pick one day each week, maybe before grocery shopping, and spend 10 minutes checking the fridge, pantry, and counters. Toss old leftovers, return misplaced tools, and note what you already have before you buy more.
Use a one-in, one-out rule for mugs, water bottles, lunch containers, and small gadgets. These categories multiply fast because they are cheap and easy to justify. If you have the space, you could also keep a donation bag in a pantry corner or in the laundry room so you have an easy catchall the moment you notice anything that can go.
One more habit helps a lot: run a monthly cabinet scan. Open each cabinet and drawer for 30 seconds. If something is hard to reach, hard to stack, or never used, deal with it immediately. That reset routine keeps clutter from quietly rebuilding!
Your kitchen doesn’t need to look perfect. It needs to work on hectic mornings, during dinner prep, and when you have guests over. If you start with clear goals, sort one zone at a time, and limit what stays on the counters, you’ve already won half the battle by removing most of the friction that makes kitchens feel crowded.
Pick one section today and finish it completely before moving on. A single drawer or one upper cabinet is enough to build momentum! Once you feel how much easier it is to cook in a kitchen where every item has a place, the rest of the checklist becomes much easier to finish.

Leave a Reply